SvelteKit Remote Functions - 표 형태 UI에서 validation은 어떻게 해야 할까?
preflight로 테이블을 만들다가 버그(#15270)를 만났다. minlength, maxlength 같은 HTML 유효성 검사 속성이 무시되는 문제인데 — 6자리여야 하는 input에 1만 입력해도 POST 요청이 그냥 나가버린다. 버그를 파다 보니 더 근본적인 문제가 보였다.
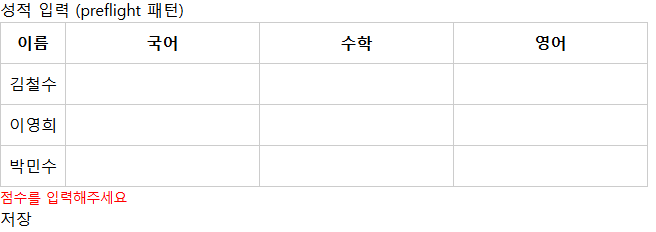
form() + preflight()는 일반적인 폼에서는 아주 잘 동작한다. 필드마다 에러 메시지를 바로 아래에 띄워주고, :user-invalid CSS로 input 테두리 색도 바꿀 수 있다. 하지만 테이블 셀 안에 input이 빽빽하게 들어가는 UI에서는 이야기가 달라진다. 같은 성적 입력 화면을 preflight 패턴과 command 패턴으로 각각 만들어보면 차이가 확실하다.
같은 화면, 다른 접근
성적 입력 테이블 — 학생 3명, 과목 3개 = input 9개.
preflight 패턴으로 만들면
문제 1: 필드명을 풀어 써야 한다
form()은 FormData 기반이라 배열을 그대로 못 받는다. 학생별 점수를 korean_1, math_2 같은 flat한 필드명으로 풀어야 한다.
1
2
3
4
5
6
7
8
9
10
11
12
13
14
15
16
17
18
19
20
21
// data.ts
const score = () =>
  v.pipe(
    v.string(),
    v.nonEmpty("점수를 입력해주세요"),
    v.transform(Number),
    v.minValue(0, "0 이상"),
    v.maxValue(100, "100 이하"),
  );

export const Schema = v.object({
  korean_1: score(),
  math_1: score(),
  english_1: score(),
  korean_2: score(),
  math_2: score(),
  english_2: score(),
  korean_3: score(),
  math_3: score(),
  english_3: score(),
});
학생이 3명이면 필드 9개, 10명이면 30개. 스키마가 학생 수에 비례해서 늘어난다.
문제 2: 루프를 못 쓴다
fields에 동적 키로 접근하면 타입 에러가 난다. saveScores.fields[korean_${idx}]는 타입스크립트가 추론을 못 하기 때문에, 행을 직접 풀어 써야 한다.
1
2
3
4
5
6
7
8
9
10
11
12
13
14
15
16
17
18
19
<form {...saveScores.preflight(Schema)}>
  <table>
    <tbody>
      <tr>
        <td>김철수</td>
        <td><input {...saveScores.fields.korean_1.as('text')} /></td>
        <td><input {...saveScores.fields.math_1.as('text')} /></td>
        <td><input {...saveScores.fields.english_1.as('text')} /></td>
      </tr>
      <tr>
        <td>이영희</td>
        <td><input {...saveScores.fields.korean_2.as('text')} /></td>
        <td><input {...saveScores.fields.math_2.as('text')} /></td>
        <td><input {...saveScores.fields.english_2.as('text')} /></td>
      </tr>
      <!-- 학생이 늘어날 때마다 행을 복붙해야 함 -->
    </tbody>
  </table>
</form>
문제 3: input type이 text가 된다
form()은 FormData에서 값을 가져오기 때문에 모든 값이 문자열이다. .as()는 'text', 'email' 같은 문자열 기반 input type만 지원하고, 'number'는 지원하지 않는다. 숫자 입력인데 type="text"가 되는 셈.
문제 4: 에러 메시지가 위치를 못 가리킨다
issues()는 필드 이름만 알려준다. korean_1에서 에러가 났다는 건 알 수 있지만, 테이블에서 그 셀이 시각적으로 어디에 있는지 가리킬 수 없다.
최선이 모든 필드의 issues()를 직접 나열해서 첫 번째 에러를 꺼내 폼 하단에 띄워주는 것이다.
1
2
3
4
5
6
7
8
9
10
11
12
13
14
15
16
17
18
19
20
21
22
<script>
  import { Schema } from './data';
  import { saveScores } from './data.remote';

  const firstIssue = $derived(
    [
      ...(saveScores.fields.korean_1.issues() ?? []),
      ...(saveScores.fields.math_1.issues() ?? []),
      ...(saveScores.fields.english_1.issues() ?? []),
      ...(saveScores.fields.korean_2.issues() ?? []),
      ...(saveScores.fields.math_2.issues() ?? []),
      ...(saveScores.fields.english_2.issues() ?? []),
      ...(saveScores.fields.korean_3.issues() ?? []),
      ...(saveScores.fields.math_3.issues() ?? []),
      ...(saveScores.fields.english_3.issues() ?? [])
    ][0]
  );
</script>

{#if firstIssue}
  <p style="color: red">{firstIssue.message}</p>
{/if}
루프를 못 쓰니까 필드를 하나씩 다 나열해야 한다. 문제 2가 여기서도 반복된다.
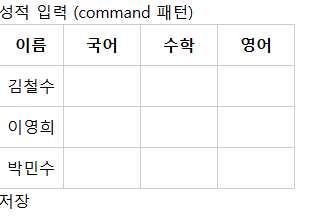
command 패턴으로 만들면
HTML required로 위치를 가리킨다
<form> 안에 required를 넣으면 브라우저가 해당 input 바로 옆에 tooltip을 띄워준다. 테이블에서 어떤 셀이 비어있는지 시각적 위치로 바로 알 수 있다.

safeParse로 추가 검증
required를 우회하거나 범위 밖의 값이 들어올 경우를 대비해서 safeParse + window.alert를 추가한다. 에러 메시지에 학생 이름과 과목을 포함할 수 있다.
1
2
3
4
5
6
7
8
9
10
11
12
const result = v.safeParse(ScoresSchema, data);

if (!result.success) {
  const messages = result.issues.map((issue) => {
    const row = Number(issue.path?.[0]?.key);
    const field = issue.path?.[1]?.key;
    const student = scores[row]?.name ?? `학생 ${row + 1}`;
    return `${student}의 ${field}: ${issue.message}`;
  });
  window.alert(messages.join("\n"));
  return;
}
배열 구조라서 path[0]이 행 인덱스, path[1]이 필드명이다. scores[row].name으로 “김철수의 math: 점수를 입력해주세요” 같은 메시지를 자연스럽게 만들 수도 있고, 여러 개의 메시지를 한 번에 띄워줄 수도 있다.

루프로 깔끔하게
bind:value로 배열에 바로 바인딩하니까 {#each}로 돌릴 수 있다. 학생이 늘어나도 코드가 안 늘어난다.
1
2
3
4
5
6
7
8
9
10
11
12
13
14
15
<form onsubmit={(e) => { e.preventDefault(); handleSave(); }}>
  <table>
    <tbody>
      {#each scores as score}
        <tr>
          <td>{score.name}</td>
          <td><input type="number" bind:value={score.korean} required min="0" max="100" /></td>
          <td><input type="number" bind:value={score.math} required min="0" max="100" /></td>
          <td><input type="number" bind:value={score.english} required min="0" max="100" /></td>
        </tr>
      {/each}
    </tbody>
  </table>
  <button type="submit">저장</button>
</form>
스키마도 학생 수와 상관없이 하나:
1
2
3
4
5
6
7
8
9
10
11
12
13
14
15
16
17
18
19
20
const ScoreSchema = v.object({
  studentId: v.number(),
  korean: v.pipe(
    v.number("점수를 입력해주세요"),
    v.minValue(0, "0 이상"),
    v.maxValue(100, "100 이하"),
  ),
  math: v.pipe(
    v.number("점수를 입력해주세요"),
    v.minValue(0, "0 이상"),
    v.maxValue(100, "100 이하"),
  ),
  english: v.pipe(
    v.number("점수를 입력해주세요"),
    v.minValue(0, "0 이상"),
    v.maxValue(100, "100 이하"),
  ),
});

const ScoresSchema = v.array(ScoreSchema);
비교 정리
| preflight 패턴 | command 패턴 | |
|---|---|---|
| 스키마 | 학생 수 x 과목 수만큼 필드 나열 | 배열 스키마 하나 |
| 템플릿 | 행마다 직접 풀어 써야 함 | {#each}로 루프 |
| input type | text (FormData 제약) | number |
| 에러 위치 표시 | 폼 하단에 메시지만 표시 | required tooltip이 해당 셀에 표시 |
| 에러 메시지 | “점수를 입력해주세요” | “김철수의 math: 점수를 입력해주세요” |
| 검증 레이어 | preflight (클라이언트) + form (서버) 자동 | required (브라우저) + safeParse (클라이언트) + command (서버) |
언제 어떤 걸 써야 할까
preflight가 잘 맞는 경우:
- 필드가 세로로 쌓이는 일반적인 폼 (회원가입, 글 작성 등)
- 필드별로 바로 아래에 에러 메시지를 보여주고 싶을 때
- 필드 수가 고정되어 있을 때
command가 더 나은 경우:
- 테이블, 그리드 등 반복 구조 UI
- 같은 필드가 여러 행에 반복될 때
- 어떤 행의 어떤 필드인지 알려줘야 할 때
type="number"등 input type을 제대로 쓰고 싶을 때